Discover the ultimate guide to Drawing:plcxcsjeqpq= Mushroom. This in-depth, comprehensive blog post teaches step-by-step techniques, explores different styles, and explains the intricacies of mushroom drawing.
Introduction
Drawing mushrooms is a delightful and creative endeavor that combines artistic skill with an appreciation for nature’s intricate details. As you embark on this journey, you will uncover various techniques, styles, and tips that will enhance your ability to capture the beauty of these fascinating fungi. Mushrooms, with their diverse shapes, colors, and textures, offer endless possibilities for artistic expression. This blog post provides an extensive guide on drawing mushrooms, offering step-by-step instructions, helpful tips, and creative inspiration to refine your drawing skills. Whether you are a novice artist or an experienced illustrator, this guide elevates your mushroom-drawing techniques to new heights.
Understanding the Basics of Drawing:plcxcsjeqpq= Mushroom
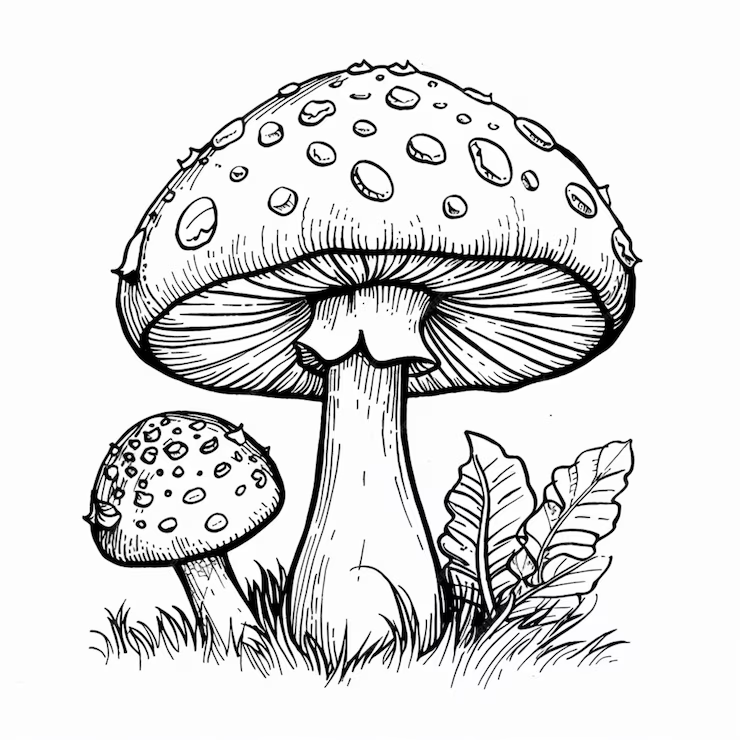
Before diving into the drawing process, it is crucial to understand the basic anatomy of mushrooms. A mushroom typically consists of two main parts: the cap and the stem. The cap, also known as the pileus, is the top part of the mushroom that often has a dome or umbrella shape. Depending on the mushroom species, it can vary in size, color, and texture. The stem, or stipe, supports the cap and connects it to the ground. Understanding these fundamental components will help you create a more accurate and realistic representation of mushrooms in your drawings.
Sketching the Basic Mushroom Shape
To begin drawing a mushroom, start by sketching the basic shapes. Begin with the cap by drawing a rounded or dome-like shape. This shape can be modified based on the type of mushroom you wish to draw. For instance, some mushrooms have a smooth, rounded cap, while others may have a more irregular or jagged appearance. Next, pull the stem as two parallel lines extending downward from the base of the cap. Depending on the mushroom variety, the stem can be straight or slightly curved. This initial sketch is the foundation for adding more detailed elements to your drawing.
Adding Details to the Mushroom Cap
Once you have the basic shape, focus on adding details to the mushroom cap. The cap’s texture and edge can significantly influence the realism of your drawing. For example, many mushrooms have a smooth surface, while others feature patterns, scales, or warts. Use small lines, dots, or stippling techniques to represent these textures. Additionally, pay attention to the cap’s edge, which can be ruffled, uneven, or fringed. Drawing these details will help bring your mushroom to life and give it a more authentic appearance.
Drawing the Mushroom Gills
The gills of a mushroom are an essential feature to include in your drawing. These are the thin, parallel structures found under the cap that release spores. To draw the gills, create lines radiating from the cap’s center towards the stem. The lines should be slightly curved to follow the cap’s contour. The gills may be close together or spaced farther apart, depending on the mushroom type. Adding this detail enhances the mushroom’s realism and provides depth to your drawing.
Detailing the Mushroom Stem
The mushroom stem is often overlooked, but it plays a significant role in the overall appearance of your drawing. Add texture to the stem by incorporating vertical lines, dots, or other patterns that reflect the mushroom’s surface. The stem can also vary in shape, so ensure that it complements the cap’s design. For instance, some mushrooms have a bulbous base or a slightly swollen stem. Detailing the stem will add dimension and realism to your drawing, making it look lifelike.
Shading Techniques for Realistic Mushroom Drawing
Shading is crucial to drawing mushrooms, as it creates a three-dimensional effect and adds depth. To achieve realistic shading, consider the light source’s direction. Shade the side of the mushroom away from the light source, creating a gradual transition from light to dark. Use techniques such as hatching, cross-hatching, or blending to achieve smooth shading. Pay attention to the cap’s curve and the stem’s shape to ensure that the shading complements the overall form.

Adding Color to Your Mushroom Drawing
Color can significantly enhance the visual appeal of your mushroom drawing. Depending on the mushroom type, you can use various colors, from subtle browns and whites to vibrant reds and yellows. When coloring, apply multiple layers to build up the desired intensity and blend shades for a natural look. Consider the cap’s texture and stem’s surface when choosing colors. For example, a mushroom with a textured cap might have varying shades to reflect its surface characteristics. Adding color will bring your mushroom drawing to life and make it stand out.
Exploring Different Mushroom Varieties
Mushrooms come in various shapes, sizes, and colors, offering many possibilities for your drawings. Explore different mushroom varieties, such as the classic button mushroom, the exotic shiitake, or the wild chanterelle. Each type has unique features and characteristics that can be captured in your artwork. Experiment with different varieties to expand your drawing repertoire and add diversity to your mushroom illustrations.
Common Mistakes to Avoid in Mushroom Drawing
As with any artistic endeavor, it’s essential to be aware of common mistakes that can detract from your mushroom drawing. One common issue is disproportionate elements, such as an overly large cap or an undersized stem. Ensure that the cap and stem are proportionate and complement each other. Additionally, avoid overly rigid or mechanical lines; aim for a more organic and natural look. Paying attention to these details will improve the overall quality of your drawing.
Using Reference Images for Accurate Drawing
Using reference images can significantly enhance the accuracy of your mushroom drawing. Gather pictures of real mushrooms to observe their shapes, textures, and colors. Study these references to understand how different mushrooms look in various lighting conditions. Incorporating reference images into your drawing process will help you achieve a more realistic and accurate representation of mushrooms.
Techniques for Drawing:plcxcsjeqpq= Mushroom Groups
Drawing:plcxcsjeqpq= Mushroom groups of mushrooms adds complexity and interest to your artwork. When drawing multiple mushrooms, consider their arrangement and spacing. Overlapping mushrooms can create a sense of depth and dimension. Please pay attention to how the mushrooms interact and ensure each one retains its unique characteristics. This technique will add a dynamic element to your drawing and make it more engaging.
Digital Tools for Drawing Mushrooms
In the digital age, artists can access various tools and software to enhance their mushroom drawings. Digital drawing tablets and software offer a range of features, such as layers, brushes, and color palettes, that can streamline the drawing process. Explore different digital tools to best suit your artistic style and needs. Digital drawing can offer greater flexibility and precision, allowing you to experiment with various techniques and styles.
The Importance of Practice and Experimentation
Practice and experimentation are crucial to improving your mushroom drawing abilities, as is any artistic skill. Regularly sketch and draw mushrooms to build your skills and develop your unique style. Experiment with different techniques, styles, and materials to discover what works best. Embrace mistakes as learning opportunities and continuously seek to refine and enhance your drawing techniques.
Incorporating Mushrooms into Art Projects
Mushrooms can be incorporated into various art projects, from illustrations to mixed media pieces. Consider how mushrooms can complement other elements in your artwork, such as landscapes, fantasy scenes, or abstract compositions. Experiment with different ways to integrate mushrooms into your art to create visually captivating and imaginative pieces.
Tips for Drawing Mushrooms from Different Angles
Drawing mushrooms from different angles adds variety and depth to your artwork. Practice drawing mushrooms from various perspectives, such as a top-down view, a side view, or a close-up. Each angle presents unique challenges and opportunities to showcase different aspects of the mushroom’s anatomy. This practice will enhance your overall drawing skills and allow you to create more dynamic and engaging mushroom illustrations.
Understanding Mushroom Symbolism in Art
Mushrooms hold various symbolic meanings in art and culture. In some cultures, mushrooms represent growth, transformation, or mysticism. Incorporating these symbolic meanings into your drawings can add depth and significance to your artwork. Explore mushrooms’ cultural and symbolic aspects to inspire your creative process and infuse your drawings with meaningful elements.

Showcasing Your Drawing:plcxcsjeqpq= Mushroom
Once you’ve completed your mushroom drawings, consider how to showcase them. Whether through social media, art galleries, or personal portfolios, presenting your work effectively is crucial. Share your drawings with others, seek feedback, and participate in art communities to gain recognition and connect with fellow artists. Showcasing your work will validate your efforts and inspire others to explore their artistic potential.
Conclusion
Drawing:plcxcsjeqpq= Mushroom is a rewarding artistic pursuit that allows you to explore the beauty and complexity of nature. You can create stunning mushroom illustrations that captivate and inspire by mastering the basics, adding intricate details, and experimenting with different techniques. Embrace the art of drawing mushrooms to express your creativity, hone your skills, and connect with the natural world.
Read Also: FTSE 100 FinTechZoom A New Era in Financial Analysis